AAMToolbox point model editor: Difference between revisions
No edit summary |
No edit summary |
||
| (One intermediate revision by the same user not shown) | |||
| Line 5: | Line 5: | ||
[[File:AAMToolbox_model_builder.png|500px|The Point Model Builder control panel]]<br> | [[File:AAMToolbox_model_builder.png|500px|The Point Model Builder control panel]]<br> | ||
The original template is shown on the left to provide a reference. The current image point model is shown in the right hand panel. The point model and lines shown here are enlarged.<br> | The original template is shown on the left to provide a reference. The current image point model is shown in the right hand panel. The point model and lines shown here are enlarged.<br> | ||
Notice that the point model does not fit the image on the right. This editor allows you to move the points to the corresponding positions in the new image.<br> | Notice that the point model does not fit the image on the right. This editor allows you to''' move the points to the corresponding positions in the new image'''.<br> | ||
The following shows the result of moving into place the points on the left side of the righthand panel. The associated image name is shown below the panel.<br> | The following shows the result of moving into place the points on the left side of the righthand panel. The associated image name is shown below the panel.<br> | ||
Once the points have all been moved into place, click the '>>' button to save the point model and move to the next image. <br><br> | [[File:AAMToolbox_model_builder2.png|500px|The Point Model Builder control panel]]<br> | ||
Once the points have all been moved into place, '''smooth the distribution of secondary points'''. Finally, click the '>>' button to save the point model and '''move to the next image'''. <br><br> | |||
Once a point model has been built for all the images, close the control panel and '''generate a shape model'''. | Once a point model has been built for all the images, close the control panel and '''generate a shape model'''. | ||
Latest revision as of 17:30, 5 February 2012
Point Model Editor
1) Select the Point Model Builder from the AAMToolbox control panel
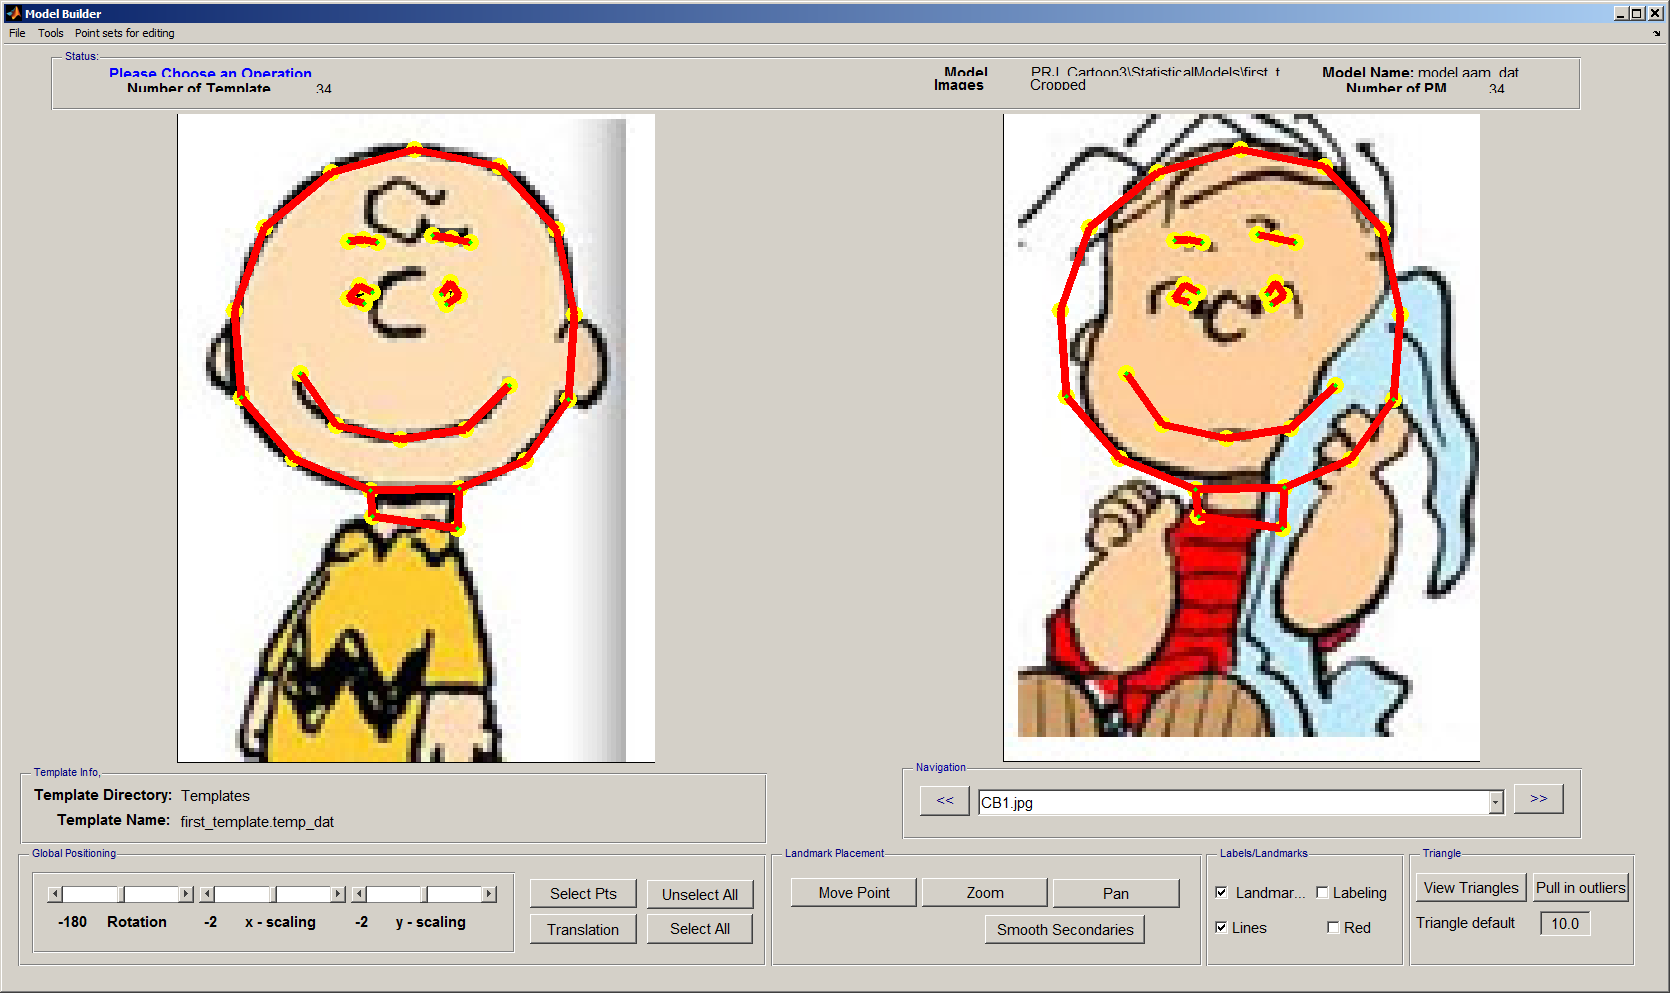
The point model editor looks like.

The original template is shown on the left to provide a reference. The current image point model is shown in the right hand panel. The point model and lines shown here are enlarged.
Notice that the point model does not fit the image on the right. This editor allows you to move the points to the corresponding positions in the new image.
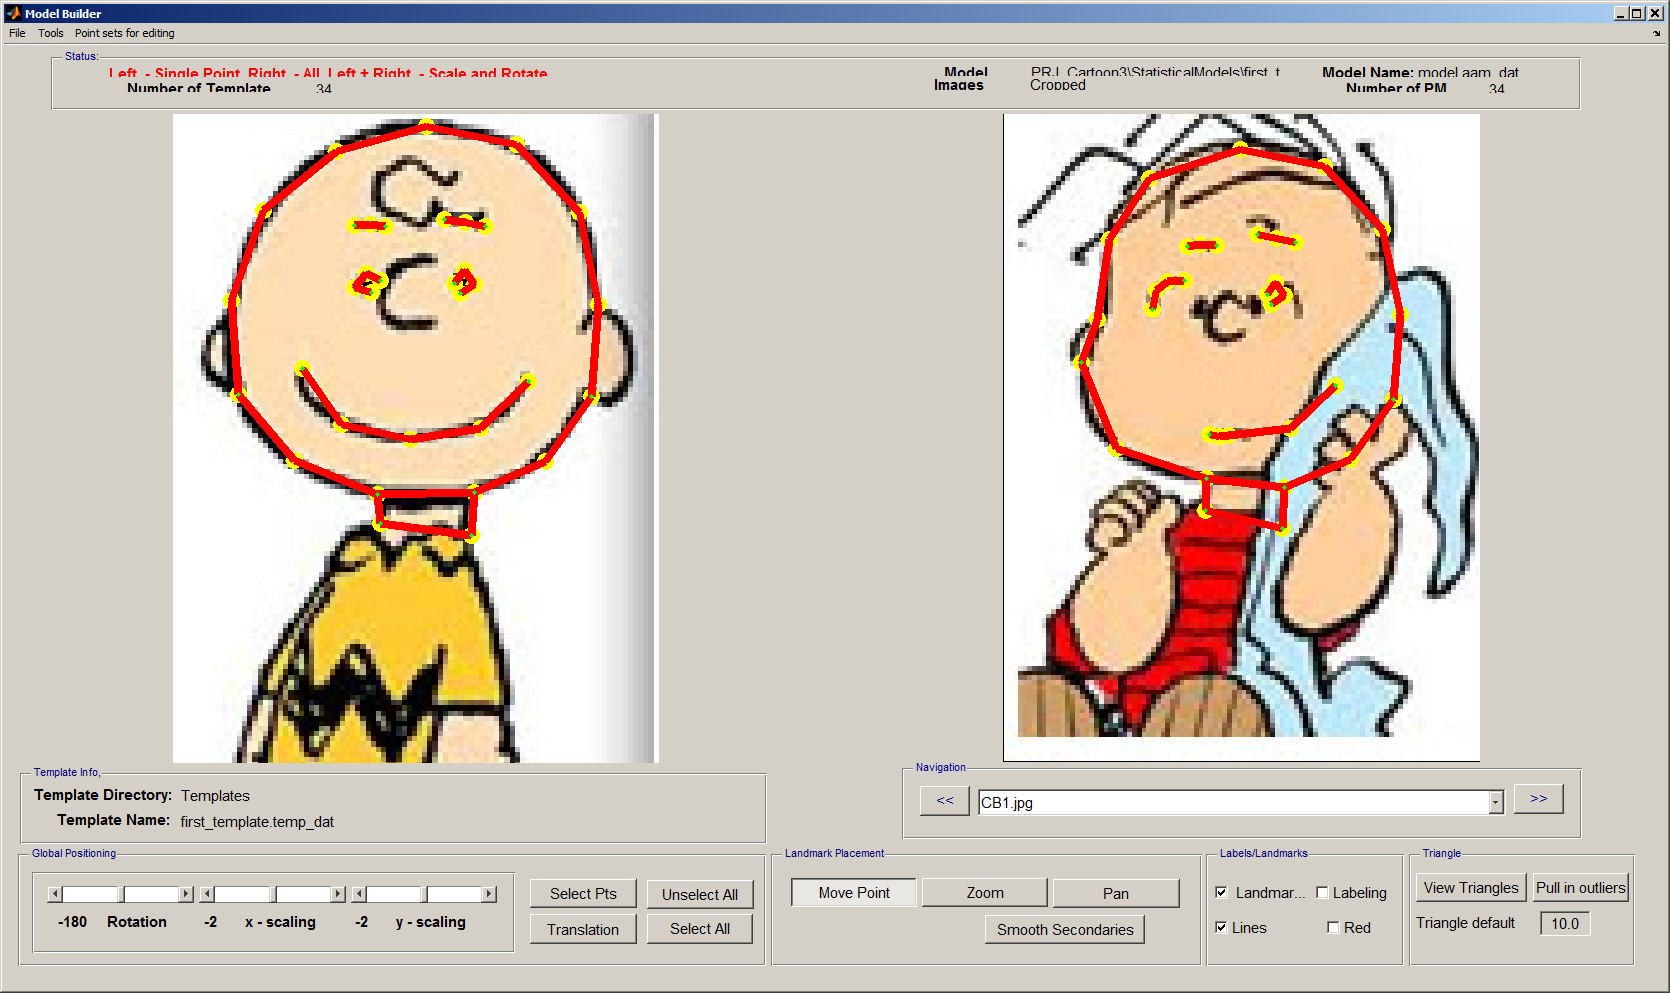
The following shows the result of moving into place the points on the left side of the righthand panel. The associated image name is shown below the panel.

Once the points have all been moved into place, smooth the distribution of secondary points. Finally, click the '>>' button to save the point model and move to the next image.
Once a point model has been built for all the images, close the control panel and generate a shape model.