GFtbox Tutorial pages: Difference between revisions
Jump to navigation
Jump to search
No edit summary |
No edit summary |
||
| Line 2: | Line 2: | ||
=In the beginning= | =In the beginning= | ||
We start with a number of very large screenshots (don't be daunted they are just here to orient you). They show the ''GFtbox'' graphical interface. | We start with a number of very large screenshots (don't be daunted they are just here to orient you). They show the ''GFtbox'' graphical interface. | ||
==First view== | |||
{| border="1" cellpadding="5" cellspacing="5" | |||
|- valign="top" | |||
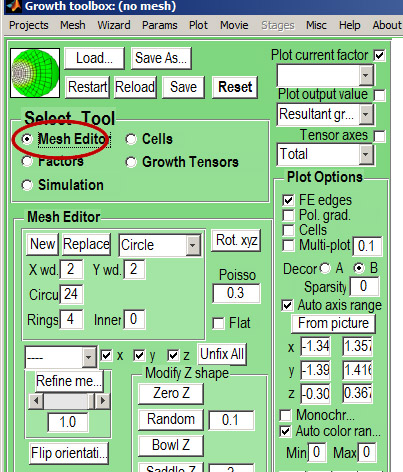
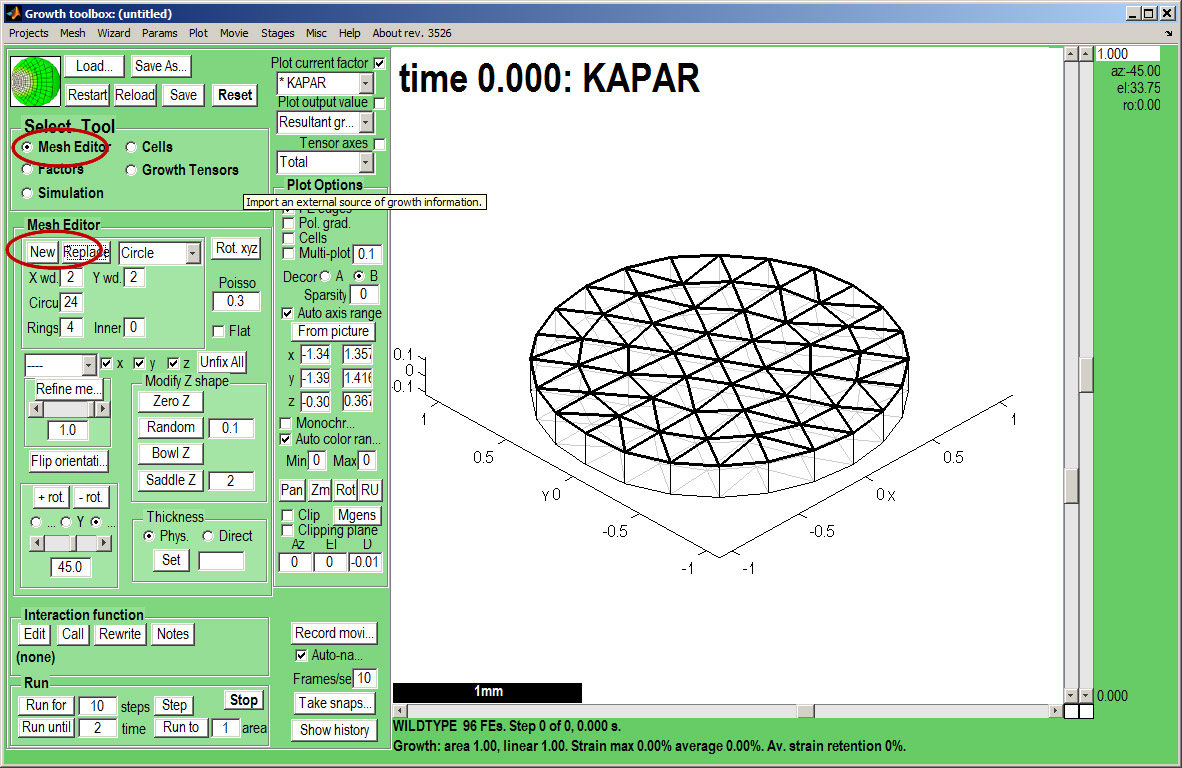
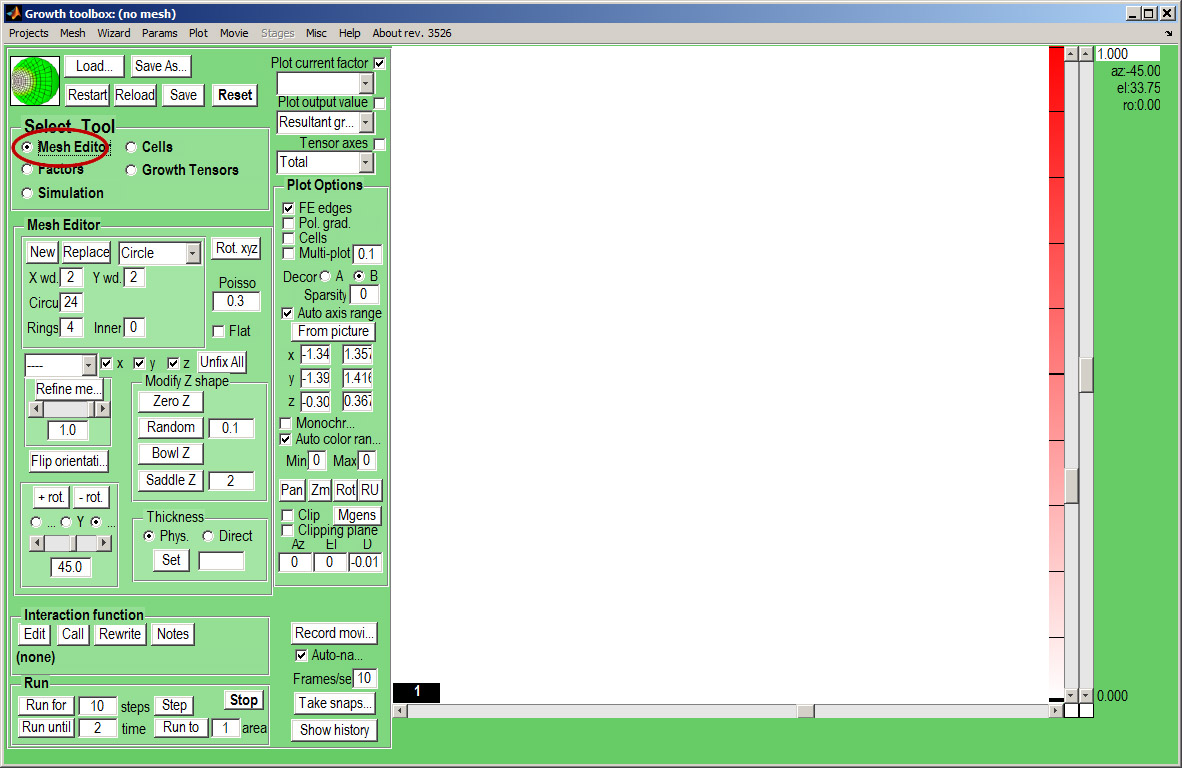
|width="300px"|The ''GFtbox'' user interface. Focus on the ''Select Tool'' Panel. Here the ''Mesh Editor'' has been selected and the ''Mesh Editor'' panel is visible. <br> | |||
[[File:gftboxGUIB_1detailB.jpg|300px]]<br> | |||
<small>Idea: change all ''GFtbox'' font sizes using ''Menu Misc:Gui Format''</small> | |||
|width="500px"|[[File:gftboxGUIB_1.jpg|500px|GFtbox interface]] | |||
|} | |||
==Add a mesh (canvas that represents tissue)== | |||
{| border="1" cellpadding="5" cellspacing="5" | |||
|- valign="top" | |||
|width="300px"|Create a canvas by clicking on ''Panel Mesh Editor:new''. A variety of preset shapes are available, here we choose a Circle with 4 concentric rings of nodes that is 2 mm in diameter.<small>Idea: Special shapes can be imported as ''OBJ'' files. ''</small> | |||
|width="500px"|[[File:gftboxGUIB_2.jpg|500px|GFtbox interface]] | |||
|} | |||
==Add a pattern of growth factor== | |||
{| border="1" cellpadding="5" cellspacing="5" | |||
|- valign="top" | |||
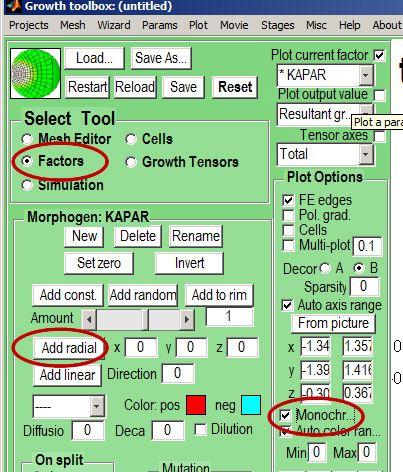
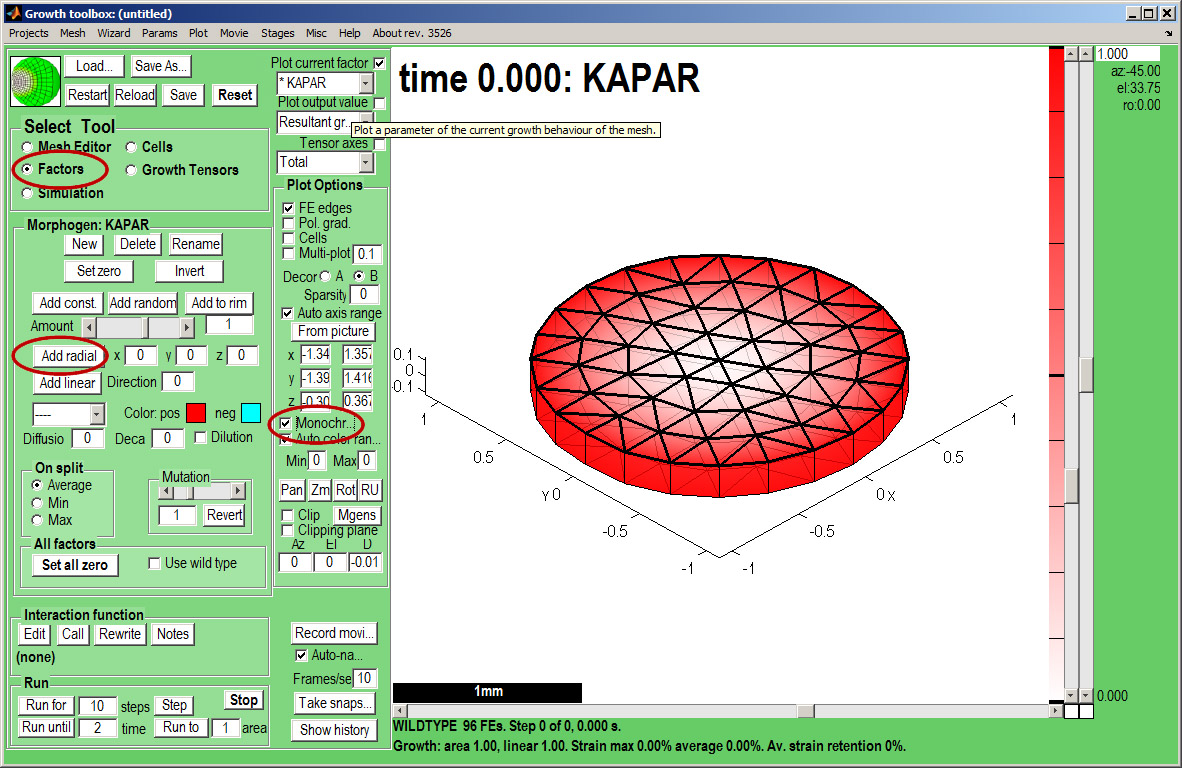
|width="300px"|''Select Tool:Factors'' makes the ''Morphogen'' Panel visible. Currently we are controlling the ''KAPAR'' factor. It has been selected from a drop down list top right (''Plot current factor''). We add a radially increasing gradient of ''KAPAR''. Make sure that the ''Panel Plot Options:Monochrome'' is ticked and the gradient of ''KAPAR'' will be as shown. <br> | |||
[[File:gftboxGUIB_3detailB.jpg|300px]] | |||
|width="500px"|[[File:gftboxGUIB_3.jpg|500px|GFtbox interface]] | |||
|} | |||
=Wavy disc= | =Wavy disc= | ||
=Interaction functions - programmatic modelling= | =Interaction functions - programmatic modelling= | ||
Revision as of 16:54, 5 May 2011
In the beginning
We start with a number of very large screenshots (don't be daunted they are just here to orient you). They show the GFtbox graphical interface.
First view
| The GFtbox user interface. Focus on the Select Tool Panel. Here the Mesh Editor has been selected and the Mesh Editor panel is visible.
|
|
