Tutorials on the Shape modelling toolbox: Difference between revisions
No edit summary |
No edit summary |
||
| Line 24: | Line 24: | ||
Image:CB9.jpg | Image:CB9.jpg | ||
</gallery> | </gallery> | ||
='''1''' <span style="color:Navy;">'''How''' to analyse 2D shapes using the Graphical User Interface< | ='''1''' <span style="color:Navy;">'''How''' to analyse 2D shapes using the Graphical User Interface</span>= | ||
The process of analysing a set of images is:- | The process of analysing a set of images is:- | ||
{| border="0" cellpadding="5" cellspacing="3" | {| border="0" cellpadding="5" cellspacing="3" | ||
| Line 40: | Line 40: | ||
#*[[AAMToolbox viewing statistical model|Tutorial on viewing statistical model.]] | #*[[AAMToolbox viewing statistical model|Tutorial on viewing statistical model.]] | ||
#'''Simplify an image point model''' using principle components. | #'''Simplify an image point model''' using principle components. | ||
#*[[AAMToolbox simplify point model|Tutorial on simplifying deviations from mean shape.]] | |||
|width="300pt"|<wikiflv width="300" height="300" logo="false" loop="true" background="white">CartoonPC1.flv|CartoonPC1.png</wikiflv><br> | |width="300pt"|<wikiflv width="300" height="300" logo="false" loop="true" background="white">CartoonPC1.flv|CartoonPC1.png</wikiflv><br> | ||
Mean shape (points) joined by lines. The movie shows deviations from the mean by varying the principle component. | Mean shape (points) joined by lines. The movie shows deviations from the mean by varying the principle component. | ||
|} | |} | ||
='''2''' <span style="color:Navy;">'''Viewing the results''' in ''Shape-Space''< | ='''2''' <span style="color:Navy;">'''Viewing the results''' in ''Shape-Space''</span>= | ||
{| border="0" cellpadding="5" cellspacing="3" | {| border="0" cellpadding="5" cellspacing="3" | ||
| Line 53: | Line 54: | ||
|width="300pt"|<wikiflv width="300" height="300" logo="false" loop="true" background="white">CartoonPC2.flv|PC2_cartoon_2.png</wikiflv> | |width="300pt"|<wikiflv width="300" height="300" logo="false" loop="true" background="white">CartoonPC2.flv|PC2_cartoon_2.png</wikiflv> | ||
|} | |} | ||
='''3''' <span style="color:Navy;">'''Comparing shapes''' from samples of different groups'< | ='''3''' <span style="color:Navy;">'''Comparing shapes''' from samples of different groups'</span>= | ||
{| border="0" cellpadding="5" cellspacing="3" | {| border="0" cellpadding="5" cellspacing="3" | ||
Revision as of 19:25, 20 February 2012
Back to AAMToolbox Documentation
The models shown in these tutorials illustrate features of the AAMToolbox software. They are not designed to understand the shape and appearance modelling which is better done from the published literature for example.
Viewing these pages. Some versions of Firefox and Explorer do not create satisfactory prints even though you can view the pages with no problems. Chrome does appear to produce good printouts.
Fives ways to use AAMToolbox
1) Analysing shapes. i.e. the arrangement of points around a shape
2) Viewing the data in shape space. i.e. approximating the data with two principle components
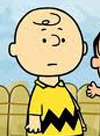
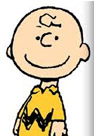
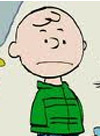
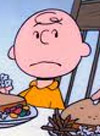
3) Comparing shapes from samples of different groups for example, comparing faces from different cartoon characters
4) Analysing shape and appearance. In addition to the points around a shape, analyse the appearance (grey scale or colour) within the shape.
5) Analysing 3D shapes
How to use these tutorials. First download and install the AAMToolbox. A zip file containing the project (PRJ_CartoonFaces) is available here. Download and unzip into a directory. Then, from Matlab, change directory into the project and launch the AAMToolbox
cd PRJ_CartoonFaces
AAMToolbox
This project contains as set of faces that have been analysed using 2D shape models
- The set of faces


1 How to analyse 2D shapes using the Graphical User Interface
The process of analysing a set of images is:-
|
<wikiflv width="300" height="300" logo="false" loop="true" background="white">CartoonPC1.flv|CartoonPC1.png</wikiflv> Mean shape (points) joined by lines. The movie shows deviations from the mean by varying the principle component. |
2 Viewing the results in Shape-Space
|
<wikiflv width="300" height="300" logo="false" loop="true" background="white">CartoonPC2.flv|PC2_cartoon_2.png</wikiflv> |
3 Comparing shapes from samples of different groups'
|
<wikiflv width="300" height="300" logo="false" loop="true" background="white">ShapeVectorWalkShowShape-21-Jun-2011-14-28-24 VD.flv|ShapeVectorWalkShowShape-21-Jun-2011-14-28-24 VD_First.png</wikiflv> |